Downlight Installation Cost in Brisbane (2026): $80–$150 Per Light
Downlight installation cost Brisbane: $80-$150 per light. See real job examples from a local Capalaba electrician. LED, dimmable, smart downlights priced honestly.
How much does it cost to install downlights in Brisbane? The average cost to install a standard LED downlight in Brisbane is $80–$150 per light, including labour and materials. At Amplus Electrical & Air, we charge a flat $150/hour with no call-out fee, so most downlight installations cost around $80–$120 per point.
I’ve installed thousands of downlights across Capalaba, Cleveland, and the Redlands over the past decade. In this guide, I’ll break down exactly what you’ll pay, what affects the cost, and how to choose the right downlights for your home. I’ll also share real examples from jobs we’ve done so you can see what to expect. For switch-specific pricing, see our light switch installation cost guide.
For related electrical work, check out our guides on switchboard upgrade costs, ceiling fan replacement pricing, and power point installation costs.
What Is a Downlight?
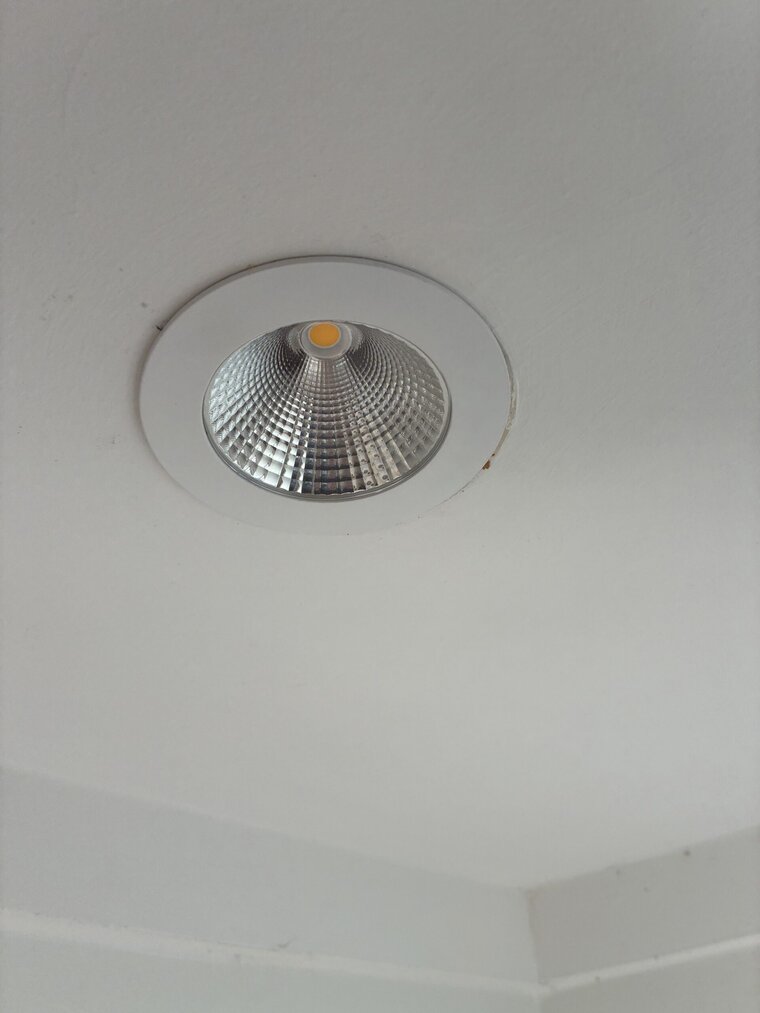
A downlight is a ceiling-mounted light fixture that directs light downward, typically recessed into the ceiling for a clean, modern look. Also called recessed lights or pot lights, downlights provide focused task lighting or general ambient lighting. Modern LED downlights are energy-efficient, long-lasting (20,000–50,000 hours), and available in various sizes, colour temperatures, and styles to suit any room.
Downlight Installation Costs in Brisbane: The Real Numbers
Here’s what licensed electricians actually charge for downlight installation in Brisbane right now: downlight installation
| Job Type | Typical Cost | Time |
|---|---|---|
| Install LED downlight (existing wiring) | $80–$150 per light | 30–45 min per light |
| Replace halogen downlight with LED | $60–$120 per light | 20–30 min per light |
| Install downlight (new wiring required) | $150–$250 per light | 45–90 min per light |
| Install 6-pack LED downlights | $600–$900 | 3–4 hours |
| Install 10-pack LED downlights | $900–$1,400 | 5–6 hours |
| Smart downlight installation | $120–$200 per light | 45–60 min per light |
| Dimmable downlight installation | $100–$180 per light | 30–45 min per light |
Amplus Electrical & Air pricing:
- $150 per hour — flat rate, no surprises
- No call-out fee — we don’t charge for travel
- Downlights not included — you supply the downlights, or we can recommend suppliers
- Bulk discounts — 6+ downlights get reduced per-point pricing
- Free quotes for jobs over $500
What Affects the Cost of Installing Downlights?
Several factors influence what you’ll pay for downlight installation:
1. Existing Wiring vs. New Wiring
If there’s already wiring in the ceiling where you want the downlights, the job is straightforward — we just connect the new lights. Cost: $80–$150 per light.
If we need to run new cable from the switchboard or existing circuits, that’s more work. We need to pull new cable through your roof cavity, install new circuit breakers if needed, and connect everything. Cost: $150–$250 per light.
2. Ceiling Access
Easy roof access (standard manhole, low pitch) keeps costs down. Difficult access (small manhole, steep roof, insulation blocking access) takes more time. Cost adds $20–$50 per light.
3. Ceiling Type
Plaster ceilings are easy to cut into. Concrete or brick ceilings require special tools and take longer. Cost adds $30–$80 per light for concrete.
4. Type of Downlight
Standard LED downlights are the cheapest ($15–$40 each). Dimmable downlights cost more ($30–$60). Smart downlights with WiFi or Bluetooth are the most expensive ($60–$150 each).
5. Number of Downlights
If you need multiple downlights installed at once, we can often save you money by batching the work. The first downlight might cost $150, but subsequent lights might only cost $80–$100 each because we’re already set up and can share some of the setup time.
6. Halogen to LED Conversion
If you’re replacing old halogen downlights with LED, the job is usually straightforward because the wiring is already there. Cost: $60–$120 per light. Plus you’ll save 70–80% on your lighting electricity bills.
LED vs. Halogen Downlights: Which Should You Choose?
Quick Answer
LED downlights are the clear winner (see our LED lighting upgrade guide for more details). They use 70–80% less electricity than halogen downlights, last 5–10 times longer, run cooler (reducing fire risk), and provide better light quality. The only advantage of halogen downlights is lower upfront cost ($5–$15 vs $15–$40 for LED), but LED downlights pay for themselves in energy savings within 1–2 years.
| Feature | LED Downlights | Halogen Downlights |
|---|---|---|
| Energy Usage | 7–15W per light | 35–50W per light |
| Lifespan | 20,000–50,000 hours (10–20 years) | 2,000–4,000 hours (1–3 years) |
| Heat Output | 30–50°C (cool) | Up to 200°C (very hot) |
| Light Quality | Multiple colour temps (2700K–5000K+) | Limited to warm white (2700K–3000K) |
| Maintenance | Virtually none | Frequent globe replacement |
| Upfront Cost | $15–$40 per light | $5–$15 per light |
| Annual Energy Cost (10 lights, 4 hrs/day) | $15–$25 | $80–$120 |
| Environmental Impact | Low (less energy, no toxic materials) | High (more energy, frequent waste) |
Bottom line: If you still have halogen downlights, upgrading to LED is one of the easiest energy-saving improvements you can make. Most homeowners recoup the cost within 1–2 years through lower electricity bills.
Types of Downlights: Which One Do You Need?
Here are the most common types of downlights we install in Brisbane homes:
1. Standard LED Downlights
The most common type. Energy-efficient, long-lasting (20,000–50,000 hours), and available in various colour temperatures (warm white, cool white, daylight). Cost: $15–$40 each.
Best for: Living rooms, kitchens, hallways, bathrooms, general lighting.
2. Dimmable LED Downlights
Can be dimmed using a compatible dimmer switch. Great for creating ambiance and saving energy. Cost: $30–$60 each.
Best for: Living rooms, dining rooms, bedrooms, home theatres.
Important: Make sure your dimmer switch is compatible with LED downlights. Old dimmers designed for incandescent or halogen lights can cause flickering or buzzing.
3. Smart LED Downlights
WiFi or Bluetooth-enabled downlights that can be controlled via smartphone app, voice assistant (Alexa, Google Home), or automation routines. Can change colour temperature, brightness, and schedule on/off times. Cost: $60–$150 each.
Best for: Smart homes, automation enthusiasts, energy monitoring, rental properties (remote control).
4. Colour-Changing LED Downlights
Can change between warm white, cool white, and daylight colour temperatures. Some models can also change to RGB colours. Cost: $50–$120 each.
Best for: Living rooms, entertainment areas, kids’ bedrooms, mood lighting.
5. Fire-Rated Downlights
Designed to maintain the fire rating of your ceiling. Required in certain locations (like near fire-rated walls or in multi-storey homes). Cost: $40–$80 each.
Best for: Multi-storey homes, garages, areas with fire-rated ceilings.
6. Waterproof Downlights (IP65)
Rated for wet areas like bathrooms, laundries, and outdoor spaces. Protected against water jets and dust. Cost: $40–$90 each.
Best for: Bathrooms, laundries, covered outdoor areas, showers.
How to Install Downlights: Step-by-Step Process
Important Safety Note
Downlight installation requires working with electrical wiring and should only be performed by a licensed electrician. DIY electrical work is illegal in Queensland and can void your home insurance, cause fires, or result in electric shock. This guide explains the process so you understand what’s involved, but always hire a professional.
Here’s how we install downlights at Amplus Electrical & Air:
Step 1: Planning and Layout (15–30 minutes)
We start by planning the downlight layout. For general lighting, we space downlights 1–1.5 metres apart. For task lighting (like over kitchen benches), we position them directly above work areas. We mark the ceiling with pencil to show you exactly where each downlight will go.
Step 2: Turn Off Power (5 minutes)
We turn off the relevant circuit at the switchboard and verify the power is off using a voltage tester. Safety first — we never work on live circuits.
Step 3: Cut Holes in Ceiling (10–15 minutes per light)
Using a hole saw or jab saw, we cut holes in the plaster ceiling at the marked positions. The hole size matches the downlight’s cutout dimension (usually 90mm, 120mm, or 150mm). We’re careful to avoid ceiling joists and existing wiring.
Step 4: Run Wiring (30–60 minutes per light)
If there’s existing wiring, we connect the new downlight to it. If not, we run new cable from the switchboard or an existing lighting circuit. We pull cable through the roof cavity, secure it properly, and install a new circuit breaker if needed.
Step 5: Install Downlight (10–15 minutes per light)
We connect the downlight to the wiring, push it into the hole, and secure it with the built-in clips or springs. We ensure it’s flush with the ceiling and level.
Step 6: Test and Clean Up (10–15 minutes)
We turn the power back on, test each downlight, and clean up any dust or debris. We’ll also show you how to use any dimmer switches or smart controls.
Step 7: Issue Compliance Certificate (Within 30 Days)
All electrical work in Queensland requires a compliance certificate. We’ll email this to you within 30 days of completing the work. Keep it for your records — you may need it if you sell your home.
Real Examples: Downlight Installations We’ve Done in the Redlands
Here are some real jobs we’ve completed across Brisbane and the Redlands, with actual costs:
Example 1: Replace 8 Halogen Downlights with LED in Capalaba
The job: Customer had 8 old halogen downlights in their living room that were hot, used too much electricity, and kept blowing globes. We replaced all 8 with modern LED downlights.
The cost:
- Labour: 2.5 hours @ $150/hour = $375
- Remove old halogen downlights: included
- Total: $375 (downlights not included — customer supplied)
Energy savings: Old halogens used 50W each = 400W total. New LEDs use 12W each = 96W total. That’s a 76% reduction. Customer saves around $80–$120 per year on electricity.
Example 2: Install 6 LED Downlights in Cleveland Kitchen
The job: Customer was renovating their kitchen and wanted 6 LED downlights installed for better task lighting. Existing lighting circuit was available, so we tapped into it.
The cost:
- Labour: 3 hours @ $150/hour = $450
- Cut 6 holes in plaster ceiling: included
- Total: $450 (downlights not included)
Example 3: Install 10 Dimmable Downlights in Alexandra Hills Living Room
The job: Customer wanted 10 dimmable LED downlights in their living room for ambiance. We installed all 10 and added a compatible dimmer switch.
The cost:
- Labour: 4.5 hours @ $150/hour = $675
- Dimmer switch: $80
- Total: $755 (downlights not included)
Example 4: Install 4 Smart Downlights in Thornlands Bedroom
The job: Customer wanted smart downlights that could be controlled via smartphone and voice assistant. We installed 4 WiFi-enabled downlights and configured them with their existing smart home system.
The cost:
- Labour: 2.5 hours @ $150/hour = $375
- Smart home configuration: $60
- Total: $435 (downlights not included)
Example 5: Install 12 Downlights in Victoria Point Open-Plan Area
The job: Customer had a large open-plan living/dining/kitchen area and wanted 12 downlights installed for even lighting throughout. We ran a new circuit from the switchboard to handle the load.
The cost:
- Labour: 6 hours @ $150/hour = $900
- New circuit cable and breaker: $120
- Total: $1,020 (downlights not included)
Note: If they’d installed the downlights one at a time, it would have cost around $1,440. Batching the work saved them $420.
How Long Does It Take to Install Downlights?
Quick Answer
Most downlight installations take 30–45 minutes per light. A 6-pack installation takes 3–4 hours total. A 10-pack installation takes 5–6 hours total. If we need to run new wiring, add an extra 30–60 minutes per light.
Here’s a breakdown by job type:
- Single downlight (existing wiring): 30–45 minutes
- Replace halogen with LED: 20–30 minutes per light
- Install downlight (new wiring): 45–90 minutes per light
- 6-pack downlights: 3–4 hours total
- 10-pack downlights: 5–6 hours total
If we need to run new circuits or work in difficult roof access, add an extra 30–60 minutes per light.
Can I Install Downlights Myself?
Short Answer: No
Queensland law requires a licensed electrician for all downlight installation. DIY electrical work is illegal and can void your home insurance, cause fires, or result in electric shock. Always use a licensed electrician — it’s not worth the risk.
Here’s why DIY downlight installation is a bad idea:
- Void your home insurance — if there’s a fire caused by unlicensed work, your insurer won’t pay out
- Be dangerous — you risk electric shock, fire, or death
- Fail inspection — if you sell your home, unlicensed work will be flagged in the building inspection
- Cost more to fix — we often get called out to fix DIY electrical work, and it costs more to undo and redo it properly
Always use a licensed electrician. It’s not worth the risk. (Same goes for safety switch installation and other electrical work.)
How to Choose the Right Downlights for Your Home
Here’s what to consider when choosing downlights:
1. Colour Temperature
| Colour Temperature | Best For |
|---|---|
| 2700K (Warm White) | Living rooms, bedrooms, dining rooms |
| 3000K (Soft White) | Kitchens, hallways, bathrooms |
| 4000K (Cool White) | Kitchens, offices, task lighting |
| 5000K+ (Daylight) | Garages, workshops, retail spaces |
2. Beam Angle
Narrow beam (30–45°) for spotlighting and task lighting. Wide beam (60–120°) for general lighting and larger areas.
3. Size
Standard sizes are 90mm, 120mm, and 150mm cutout. Make sure the downlight fits your existing holes or plan for new holes.
4. Dimmable or Non-Dimmable
If you want to control brightness, choose dimmable downlights and a compatible dimmer switch. Non-dimmable downlights are cheaper but can’t be dimmed.
5. IP Rating
IP20 for dry indoor areas. IP44 for bathrooms and covered outdoor areas. IP65 for exposed outdoor areas and showers.
6. Colour Rendering Index (CRI)
CRI measures how accurately colours appear under the light. Look for CRI 80+ for general use, CRI 90+ for task lighting and areas where colour accuracy matters (like kitchens and bathrooms).
How to Save Money on Downlight Installation
Here’s how to keep your costs down:
1. Batch Multiple Downlights
If you need several downlights installed, do them all at once. We can share setup time, which saves you money. As we saw in Example 5, batching 12 downlights saved the customer $420.
2. Replace Halogen with LED
If you have old halogen downlights, replacing them with LED is cheaper than installing new downlights from scratch because the wiring is already there. Plus you’ll save money on electricity bills.
3. Use Existing Circuits
If there’s already a lighting circuit in the area where you want the downlights, the job is cheaper. Adding new circuits costs more because we need to run new cable from the switchboard.
4. Supply Your Own Downlights
You can buy downlights from Bunnings, Beacon Lighting, or online retailers. Make sure they’re quality downlights with a good warranty. We’ll install them for you.
5. Get Multiple Quotes
For jobs over $500, get at least 3 quotes from licensed electricians. Compare the scope of work, materials, and total cost. Don’t just pick the cheapest option — check reviews and ask about their experience.
Why Choose Amplus Electrical & Air for Downlight Installation?
Here’s why homeowners across the Redlands choose us:
1. Transparent Pricing
We charge a flat $150/hour with no call-out fee. You know exactly what you’re paying from the moment we arrive. No hidden fees, no surprises.
2. Licensed and Insured
We’re fully licensed (QLD Electrical Contractor Licence #1500996) and insured. That means you’re protected if something goes wrong. All our work comes with a compliance certificate.
3. Local and Experienced
I’ve been an electrician in Capalaba for over a decade. I know the area, I know the common issues in Brisbane homes, and I can fix problems quickly. That saves you time and money.
4. Same-Day Service
Most downlight installations can be done same-day or next-day. Call us in the morning, and we’ll usually have it sorted by the afternoon.
5. Quality Work Guaranteed
We stand behind our work. If something goes wrong after we leave, we’ll come back and fix it. That’s the difference between a licensed professional and a cowboy sparky.
Ready to Upgrade Your Downlights?
Amplus Electrical & Air provides professional downlight installation across Brisbane. Licensed, insured, and guaranteed work.
📞 Call Aaron: 0419 014 146
📅 Book Online: Schedule a free quote
Frequently Asked Questions
How much does it cost to install downlights in Brisbane?
Downlight installation in Brisbane costs $80–$150 per light including labour. At Amplus Electrical & Air, we charge $150/hour with no call-out fee, so most installations cost around $80–$120 per point (downlights not included).
How much does it cost to replace halogen downlights with LED?
Replacing halogen downlights with LED costs $60–$120 per light in Brisbane. The wiring is already there, so the job is straightforward. You’ll save 70–80% on your lighting electricity bills.
How much does it cost to install 6 downlights?
Installing 6 LED downlights in Brisbane costs $600–$900 including labour. If you need new wiring, add $200–$400. At Amplus, we charge $150/hour with no call-out fee.
Can I install downlights myself in Brisbane?
No. Queensland law requires a licensed electrician for all downlight installation. DIY electrical work is illegal and can void your home insurance, be dangerous, and cost more to fix.
How long does it take to install downlights?
Most downlight installations take 30–45 minutes per light. A 6-pack installation takes 3–4 hours total. If we need to run new wiring, add an extra 30–60 minutes per light.
Do I need a compliance certificate for downlight installation?
Yes. All electrical work in Queensland must be accompanied by a compliance certificate (Electrical Safety Certificate). Your electrician should provide this within 30 days of completing the work.
What’s the difference between dimmable and non-dimmable downlights?
Dimmable downlights can be controlled with a dimmer switch to adjust brightness. Non-dimmable downlights are always at full brightness. Dimmable downlights cost more but give you more control.
How many downlights do I need for a room?
As a general rule, space downlights 1–1.5 metres apart. For a 4m x 4m room, you’d need 9–12 downlights. For a 3m x 3m room, you’d need 6–9 downlights. Your electrician can assess your specific needs.
Can I use LED downlights with my existing dimmer switch?
Maybe. Old dimmer switches designed for incandescent or halogen lights can cause LED downlights to flicker or buzz. You might need to upgrade to an LED-compatible dimmer switch ($80–$150 installed).
How much electricity do LED downlights use?
LED downlights use 7–15W each, compared to 35–50W for halogen downlights. That’s 70–80% less electricity. Running 10 LED downlights for 4 hours per day costs around $15–$25 per year.
About the Author: Aaron Ross is a licensed electrician and owner of Amplus Electrical & Air in Capalaba, Brisbane. He holds Queensland Electrical Contractor Licence #1500996 and ARCtick Licence AU number for refrigerant handling.
Amplus serves Brisbane, the Redlands, and Bayside suburbs with same-day electrical and air conditioning services.
Need help? Call 0419 014 146 or book online.
How Many Downlights Do You Need Per Room?
Quick Answer
As a general rule, space downlights 1–1.5 metres apart for even lighting. For a standard 4m x 4m room, you’ll need 9–12 downlights. For a 3m x 3m room, you’ll need 6–9 downlights. For kitchens, plan 8–12 downlights depending on layout. Your electrician can assess your specific needs based on room size, ceiling height, and lighting goals.
Here’s a room-by-room guide for downlight placement:
Living Room (4m x 4m)
Recommended: 9–12 downlights
Space downlights 1.2–1.5 metres apart in a grid pattern. Avoid placing them directly above seating areas where they can cause glare. Consider dimmable downlights for ambiance control.
Kitchen (3m x 4m)
Recommended: 8–12 downlights
Focus on task lighting over benches, sink, and cooking areas. Space downlights 1 metre apart over work zones. Use 4000K (cool white) for better visibility when preparing food.
Bedroom (3m x 3m)
Recommended: 6–9 downlights
Use warm white (2700K–3000K) for a relaxing atmosphere. Install dimmable downlights so you can adjust brightness for reading or winding down. Avoid placing downlights directly above the bed.
Bathroom (2m x 3m)
Recommended: 4–6 downlights
Use IP44-rated downlights for moisture protection. Position downlights around the mirror for even lighting (avoid shadows). Use 3000K–4000K for clear visibility.
Hallway (1.5m x 4m)
Recommended: 3–5 downlights
Space downlights 1–1.2 metres apart along the length of the hallway. Use 3000K (soft white) for a welcoming feel.
Garage (3m x 6m)
Recommended: 6–10 downlights
Use 5000K (daylight) for maximum visibility. Space downlights 1.5 metres apart. Consider motion-sensor downlights for convenience and energy savings.
Common Downlight Problems (And How to Fix Them)
1. Downlights Flickering
Cause: Incompatible dimmer switch, loose wiring, or faulty downlight driver.
Fix: If you have a dimmer switch, make sure it’s LED-compatible. If the flickering persists, call an electrician to check the wiring and replace the faulty component.
2. Downlights Buzzing or Humming
Cause: Usually caused by an incompatible dimmer switch or low-quality LED driver.
Fix: Replace the dimmer switch with an LED-compatible model. If the buzzing continues, the downlight driver may need to be replaced.
3. Downlights Overheating
Cause: Insufficient ventilation, insulation covering the downlight, or using the wrong type of downlight for the space.
Fix: Ensure downlights have adequate ventilation. If you have insulation in your ceiling, use IC-rated (insulation contact) downlights that are designed to be covered. Never cover standard downlights with insulation — it’s a fire hazard.
4. Downlights Not Turning On
Cause: Blown LED driver, tripped circuit breaker, or faulty wiring.
Fix: Check the circuit breaker first. If it hasn’t tripped, the LED driver may need to be replaced. Call an electrician to diagnose and fix the issue safely.
5. Downlights Showing Colour Differences
Cause: Mixing different colour temperatures or using downlights from different manufacturers.
Fix: Use downlights with the same colour temperature (e.g., all 3000K) and ideally the same brand/model for consistent lighting throughout the room.
Smart Downlights: Are They Worth It?
Smart downlights are becoming increasingly popular in Brisbane homes. Here’s what you need to know:
Benefits of Smart Downlights
- Remote control — turn lights on/off from your phone, even when you’re not home
- Voice control — works with Alexa, Google Home, Apple HomeKit
- Scheduling — set lights to turn on/off automatically
- Energy monitoring — track how much electricity your lights use
- Colour control — change colour temperature or even RGB colours
- Scene setting — create lighting scenes for different activities (movie night, dinner party, reading)
Popular Smart Downlight Brands
- Philips Hue — premium option, excellent colour quality, works with all major smart home platforms
- LIFX — WiFi-enabled, no hub required, good colour range
- TP-Link Kasa — budget-friendly, reliable, easy to set up
- Tuya/Smart Life — generic brand, affordable, works with Smart Life app
Are Smart Downlights Worth the Extra Cost?
Smart downlights cost $60–$150 each compared to $15–$40 for standard LED downlights. Whether they’re worth it depends on your needs:
Worth it if:
- You want voice control or remote access
- You’re building a smart home and want integrated lighting
- You want to monitor energy usage
- You have a rental property and want remote control for tenants
Not worth it if:
- You just want basic lighting
- You’re on a tight budget
- You don’t use smart home devices
My recommendation: Start with standard LED downlights in most rooms. Add smart downlights in key areas like the living room or outdoor spaces where you’ll actually use the smart features.
Need a Licensed Electrician in Brisbane Bayside?
Aaron is a licensed electrician (Lic. 1500996) and ARC-certified A/C technician serving Capalaba, Cleveland, Wynnum, Manly, Birkdale, Thornlands, Victoria Point and surrounding suburbs. Honest advice, upfront pricing, and quality work guaranteed.